
How to Clean Your Washing Machine the Right Way
When Did You Last Clean Your Washing Machine?
Most people never do it. And that’s a problem, because a washing machine that cleans your clothes every week needs to be cleaned itself on a regular schedule.
Over time, your washer collects detergent residue, fabric softener buildup, mineral scale from hard water, lint, and bacteria. This buildup causes the musty smell that many front-load washer owners are familiar with. It also makes the machine work harder, which shortens its lifespan.
The good news: cleaning your washing machine is simple, cheap, and takes less time than you think. This step-by-step guide covers every part of the machine that needs attention.
How Often Should You Clean Your Washing Machine?
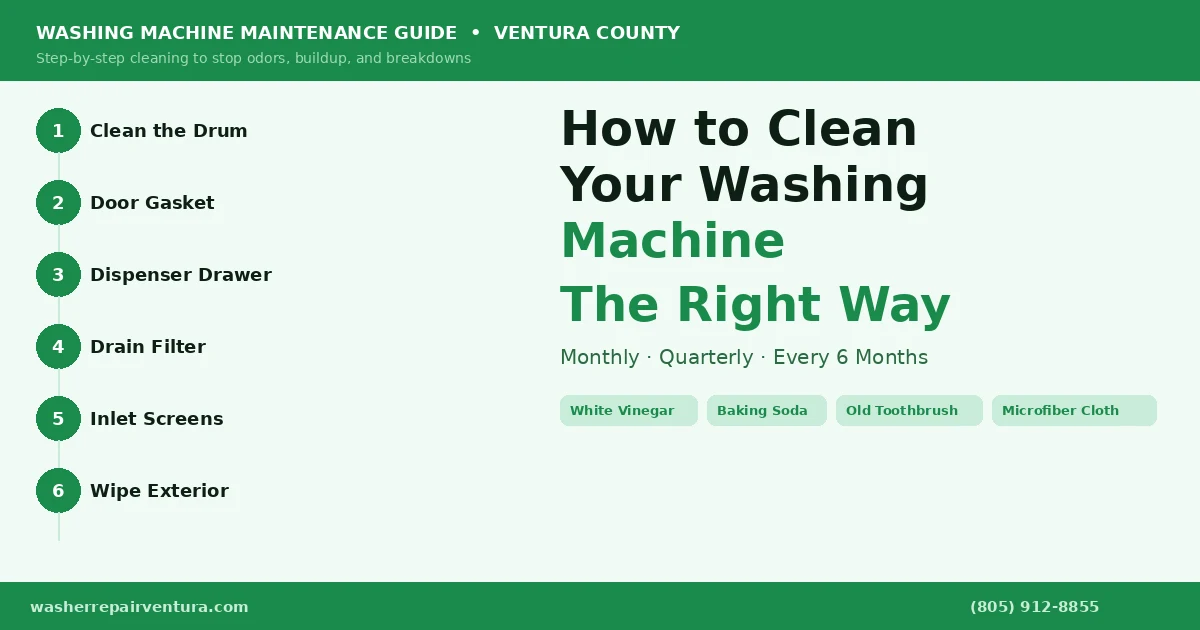
Here’s a simple schedule to follow:
Once a week: Wipe the door gasket on front-loaders. Leave the door or lid open after each wash to let the interior dry.
Once a month: Run a full drum cleaning cycle. Clean the detergent dispenser drawer.
Every 3 months: Clean the drain pump filter (front-loaders). Clean the drum interior more thoroughly with a vinegar or citric acid solution.
Every 6 months: Clean the water inlet screens on the back of the machine. Inspect the door gasket for mold, tears, or debris buildup.
In Ventura County, where the water is moderately hard, lean toward the more frequent end of these ranges. Mineral buildup happens faster in hard water areas.
What You’ll Need
You don’t need anything special. Most of these items are already in your home:
White vinegar. Baking soda. An old toothbrush or small scrub brush. Microfiber cloths or old rags. A small bowl or cup. Needle-nose pliers (for the inlet screens). Optionally: a commercial washing machine cleaner tablet like Affresh.
Step 1: Clean the Drum
The drum is where clothes go, and it’s where most of the residue and bacteria build up. There are two ways to clean it depending on how much buildup you have.
Option A: Vinegar Clean (routine monthly maintenance)
Add 2 cups of white vinegar directly into the drum — not the detergent dispenser. Set the machine to the hottest water setting and the longest cycle available. Press start and let it run all the way through.
The hot water and vinegar work together to dissolve detergent residue, mineral scale, and bacteria. This is safe to do on any washer.
Option B: Vinegar + Baking Soda (for heavier buildup or bad odors)
Run the vinegar cycle as described above. After the cycle finishes, sprinkle half a cup of baking soda directly into the drum. Run another short hot cycle. The baking soda neutralizes any remaining odors and helps lift residue that the vinegar loosened.
Do not mix vinegar and baking soda in the drum at the same time — they cancel each other out when combined. Use them in two separate cycles.
Option C: Commercial Washer Cleaner Tablet
Drop one Affresh tablet (or similar brand) into the empty drum. Run the Clean Washer cycle if your machine has one, or the hottest, longest cycle if not. These tablets are formulated specifically to break down the buildup that builds up inside washing machines. They work well and are safe for all washer types.
Step 2: Clean the Door Gasket (Front-Loaders Only)
The rubber gasket that seals the door on front-load washers is a mold magnet. Water, lint, and soap residue collect in the folds of the gasket after every wash. If you’ve ever noticed a musty smell from your front-loader, this is usually where it’s coming from.
Pull back the gasket folds all the way around. You’ll often find standing water, lint, and possibly black mold spots in the bottom fold. Here’s how to clean it:
Mix 1 tablespoon of bleach with 1 quart of water in a small bowl. Dip a cloth or old toothbrush into the solution. Scrub the entire gasket, including all the folds. Pay special attention to the bottom where water pools. Wipe everything clean with a damp cloth. Run a rinse cycle to flush any bleach residue out of the drum.
If you prefer not to use bleach, white vinegar works too, though it may take more scrubbing to remove established mold spots.
After cleaning, the most important habit is prevention: always leave the door open a few inches after each wash cycle. This lets the gasket and drum dry out completely between uses, which stops mold from forming in the first place.
Step 3: Clean the Detergent Dispenser Drawer
Pull the dispenser drawer all the way out. Most drawers have a release tab or button that lets you remove them completely. If yours won’t come out, check your owner’s manual for the release mechanism.
Rinse the drawer under hot running water. Use an old toothbrush to scrub the compartments where detergent and fabric softener go. Soap scum and fabric softener residue harden inside these compartments over time and can block the flow of water into the machine.
Also clean the cavity that the drawer slides into. Mold and residue collect in the back of this cavity where you can’t easily see. Use the toothbrush and a vinegar-dampened cloth to clean it out.
Rinse the drawer thoroughly, dry it, and slide it back in.
Step 4: Clean the Drain Pump Filter (Front-Loaders)
This is the step most people skip entirely — and it’s one of the most important ones for front-load washers.
The drain pump filter catches lint, coins, hair ties, and other small items before they reach the pump. If it gets too clogged, the pump has to strain to push water through it, which wears out the pump motor faster and can cause drain errors (5E on Samsung, OE on LG, F9 E1 on Whirlpool).
Here’s how to clean it:
Locate the small access panel at the bottom front of your machine. Open it. You’ll see a round cap (the filter) and usually a small drain hose clipped to the side. Place some old towels on the floor. If there’s a small drain hose, uncap it and let the water drain out into a bowl. Slowly unscrew the filter cap counter-clockwise. Water will flow out as the cap loosens — have towels ready. Pull the filter out completely. Remove all the lint, debris, and gunk you find. Rinse the filter under running water. Use an old toothbrush to scrub the filter housing inside the machine. Screw the filter back in firmly (it needs to seat properly or it will leak). Close the access panel.
Do this every 3 months. If you find a lot of debris, do it monthly until the amounts get smaller.
Step 5: Clean the Water Inlet Screens
On the back of your machine, you’ll see two threaded ports where the hot and cold water supply hoses connect. Pull the machine away from the wall (turn off the water supply valves first). Unscrew both hoses. Inside each port is a small mesh screen. Use needle-nose pliers to gently pull the screens out.
Hold the screens under running water and rinse them. If there’s significant mineral buildup (white or gray crust), soak them in white vinegar for 10-15 minutes, then rinse again and scrub lightly with the toothbrush.
Reinstall the screens, reconnect the hoses, and turn the water supply back on. Check for leaks.
In Ventura County’s hard water, do this every 6 months. A clogged inlet screen is one of the most common causes of fill error codes.
Step 6: Wipe Down the Exterior
This step is about appearances more than function, but it’s worth including. Wipe the outside of the machine with a damp microfiber cloth. Pay attention to the top where dust, lint, and detergent residue collect. On top-loaders, wipe the inside lip of the lid. On front-loaders, wipe the glass door inside and out.
Do not spray water or cleaning products directly onto the control panel. Spray onto a cloth first, then wipe.
Step 7: Check the Drum for Odors After Cleaning
After running your cleaning cycle and wiping everything down, do a smell test: open the door and sniff the drum. A clean washer should smell neutral — maybe faintly of vinegar if you used it, but nothing sour, musty, or moldy.
If odors persist after a thorough cleaning, there may be mold or residue in a part of the machine you can’t easily reach — the outer tub, internal hoses, or under the drum seal. At that point, a service call may be worth it. A technician can clean parts of the machine that aren’t accessible from the outside.
How to Prevent Buildup Between Cleanings
Cleaning the machine monthly is much easier than cleaning a machine that hasn’t been touched in a year. These daily habits make a real difference:
Leave the door or lid open after every wash. This is the single most effective thing you can do to prevent mold and mildew in a front-loader. Even leaving it open a few inches is enough to let the interior dry out.
Remove laundry as soon as the cycle ends. Wet clothes sitting in a warm drum create the perfect environment for mold. Set a timer if you tend to forget.
Use the right amount of detergent. More soap does not mean cleaner clothes. Too much detergent leaves residue that builds up inside the drum and hoses. Use less than the cap suggests, especially in a high-efficiency machine.
Use HE detergent in HE machines. HE (high-efficiency) washers use less water. Regular detergent creates too much foam for the amount of water available, leaving thick residue behind.
Wipe the door gasket weekly. On front-loaders, a quick weekly wipe prevents mold from getting established in the gasket folds.
Questions About Your Washer? We’re in Ventura County.
If your washing machine has odors, errors, or problems that cleaning didn’t fix, we can help. We service all major brands across Ventura County — Ventura, Oxnard, Port Hueneme, Oak View, El Rio, and Saticoy. Call (805) 912-8855 or book online.